Blogger SEO has Made Easy with New Search Preference Option
Good News For All Bloggers!. Blogger has Introduced a New “Search Preferences” Option. This is Really a Great Option for blogs on Blogger Platform. Blogger added the Meta Tags, Customize Robots.txt, Redirects, Customize 404 Error Page option, Alt tags for Images.
SEO is a major part in any Website or Blog. Before Blogger had not Supported SEO. But now on Blogger SEO is Fully Functional and Dynamic. You can set the Meta Description for Each Single Post and Robots Tags separately.
1.BLOGGER ADDED THE FOLLOWING OPTIONS
1.Search Meta Description
2.Custom Post Meta Description
3.Custom 404 Error Page
4.Redirects
5.Custom Robots.txt
6.Custom Robots Header Tags
7.Alt and Title tags for Images
2.ENABLE THE SEARCH PREFERENCE OPTION
This option is only Available in New Blogger UI Dashboard. to Enable the Options
Go to New Blogger Dashboard > Select the Blog
Select the Settings Tab > Search Preference

SEARCH DESCRIPTION
This is the General Description for Home Page to Optimize Home page/Blog and this Description is Visible on Search Results of Home page.
Search Description Should be a Short Description about your Blog and Max 150 Characters in Length.

CUSTOM POST META DESCRIPTION
This is the Custom Post Meta Description for Each and Every Individual Post. You can Set and Customize the Each Post Description While Creating or Editing the post area.
Under the Post Settings(on Right side of Creating/Editing Post) Click the Search Description. Enter the Small Description about your Post. Looks like there is No Limits to the Description. But Google Will Crawl Around 160+ Characters only. So Keep your Post Description as Short as possible.

CUSTOM 404 ERROR PAGE
Bye bye!! Blogger Default Error/404 Not Found Page
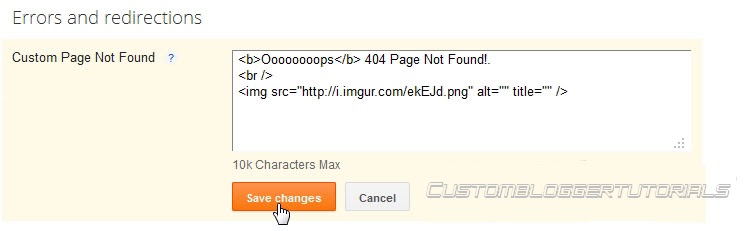
Blogger Providing the Custom Error/404 Not Found Page. This Error/404 message is Usually Visible in Blogger Status Message Bar.
You can add Custom Error/404 message with HTML tags or Even Images Also
REDIRECTS
This is also A Great New Option in Blogger.
To Redirect a One Page form Another Page, You can use this Option and Redirect easily.
The Redirection is 302 Temporary Redirection and Redirection is sent through HTTP Headers.

____________________________________________________________________________________________________________________________________________________________________________________________________________________________________________________________________________________________________________________________________
__________________________________
__________________________________
5 Effective Ways to Build Organic Backlinks
Here are 5 Effective Ways to Built organic backlinks quickly. Apart from writing quality content and promoting it through social media, it’s necessary to have some quality backlinks to your blog. After the recent search algorithm changes by Google, many blogs are punished for several reasons. To stay safe and ahead of your competitors, it’s necessary to take some action and building organic backlinks will surely help.
This article is written after getting inspired from a video by Matt Cutts, the head of Google SPAM Team. He clearly mentioned some good points on how to build organic backlinks.
WHAT ARE ORGANIC BACKLINKS ?
There are thousands of ways to build links to your blog and none of them are equal to “Organic Backlinks”. In simple words, organic backlinks can be explained as the links that are naturally constructed, which usually happens when you focus on high quality and unique content.
HOW TO BUILT ORGANIC BACKLINKS ?
Here are 5+ sure fire tips that help to built organic backlinks to your blog.
1. CONTROVERSIES
Indulging in a Controversy will easily highlight things mostly if you are on the negative side. You need to follow-up regularly and have to be in touch with trending topics. Words have such a great power and believe me, with a single blog post you can grab the attention of the whole media. Play it safe or otherwise you may face some legal issues
2. EXPERIMENTS
Experimenting on things will depend on your interest and passion to achieve something. Not everyone can do experiments as it needs lot of time and patience. So, if you are goot at something, then try to experiment on things and publish posts like How-to guides on your blog. This is how unique content can be built and organic backlinks will flow to your article, sometimes for years.
3. FREEBIES
Using a feebie to get subscribers and backlinks is an old yet powerful strategy. You cannot get backlinks immediately, but over time you can get some quality backlinks. This depends on the quality and type of freebie you are providing. If its a regular one, like a free PSD template or a free theme then there wont be much use. Try to work on creative things and give them away for free.
4. COMMUNITIES
Lets consider some blogs in the WordPress niche. There are quite popular and useful blogs on WordPress that help to make the most out of your WordPress blog. Whenever they write an article or list out some resources, links to the articles on other blogs will be included. This purely depends on the author of the article and so its necessary to establish some connections with fellow bloggers.
5. VIDEO BLOGGING
Many have the talent to create useful videos yet don’t try it. Consistent exposure can be gained through video blogging and if you need a sort of inspiration to start with, then you can check TheNewBoston (http://thenewboston.org/tutorials.php). That guy got good programming skills and he is sharing some knowledge through his videos. Make videos and your articles will be linked on many blogs.
BONUS TIP
Forum Participation also helps to get some backlinks. All you have to do is help others by providing some useful answers for questions in sections you have knowledge on. And important thing is don’t SPAM posts with single word answers, it may result in a ban.
OVER TO YOU
That’s it from my side and if I have missed any important one, let me know through comments. If you don’t agree with any of these methods or want some proofs on how they work, lets start the discussion now.
HOW TO BUILT ORGANIC BACKLINKS ?
Here are 5+ sure fire tips that help to built organic backlinks to your blog.
1. CONTROVERSIES
Indulging in a Controversy will easily highlight things mostly if you are on the negative side. You need to follow-up regularly and have to be in touch with trending topics. Words have such a great power and believe me, with a single blog post you can grab the attention of the whole media. Play it safe or otherwise you may face some legal issues
2. EXPERIMENTS
Experimenting on things will depend on your interest and passion to achieve something. Not everyone can do experiments as it needs lot of time and patience. So, if you are goot at something, then try to experiment on things and publish posts like How-to guides on your blog. This is how unique content can be built and organic backlinks will flow to your article, sometimes for years.
3. FREEBIES
Using a feebie to get subscribers and backlinks is an old yet powerful strategy. You cannot get backlinks immediately, but over time you can get some quality backlinks. This depends on the quality and type of freebie you are providing. If its a regular one, like a free PSD template or a free theme then there wont be much use. Try to work on creative things and give them away for free.
4. COMMUNITIES
Lets consider some blogs in the WordPress niche. There are quite popular and useful blogs on WordPress that help to make the most out of your WordPress blog. Whenever they write an article or list out some resources, links to the articles on other blogs will be included. This purely depends on the author of the article and so its necessary to establish some connections with fellow bloggers.
5. VIDEO BLOGGING
Many have the talent to create useful videos yet don’t try it. Consistent exposure can be gained through video blogging and if you need a sort of inspiration to start with, then you can check TheNewBoston (http://thenewboston.org/tutorials.php). That guy got good programming skills and he is sharing some knowledge through his videos. Make videos and your articles will be linked on many blogs.
BONUS TIP
Forum Participation also helps to get some backlinks. All you have to do is help others by providing some useful answers for questions in sections you have knowledge on. And important thing is don’t SPAM posts with single word answers, it may result in a ban.
OVER TO YOU
That’s it from my side and if I have missed any important one, let me know through comments. If you don’t agree with any of these methods or want some proofs on how they work, lets start the discussion now.
How to Create Three Column Template For Blogger
You must have seen many blogs having three columns. You may also want to make your own three column Blogger Layout Template and give your blog a new level in style. So let's do it with a simple tutorial.
You can see in Design > Page elements that you already have two column, one for the main body and the other is the sidebar. So you need to create and add an extra sidebar column.
Adding the Third Sidebar Column in Blogger Template

1. Go to Design > Edit Template and backup your template.
2. Find:
#sidebar-wrapper {
width: 220px;
float: $endSide;
word-wrap: break-word; /* fix for long text breaking sidebar float in IE */
overflow: hidden; /* fix for long non-text content breaking IE sidebar float */
And change float to:
float: right;
3. Below it add:
#left-sidebar-wrap {
width: 220px;
float: left;
word-wrap: break-word;
overflow: hidden;
}
This "float: left" will make the sidebar float to left. Thus you will be having a sidebar to the left of your blogger template.
4. Find and change the width of the outer-wrapper to 900px or more to avoid overlapping of sidebar over the main-wrapper
#outer-wrapper {
width: 660px;
margin:0 auto;
padding:10px;
text-align:$startSide;
font: $bodyfont;
}
5. Find #main-wrapper and replace it with:
#main-wrapper {
width: 410px;
float: left;
margin:0 20px;
word-wrap: break-word; /* fix for long text breaking sidebar float in IE */
overflow: hidden; /* fix for long non-text content breaking IE sidebar float */
}
Here a margin to left and right of 20px is added to avoid overlapping of sidebars with the main wrapper. You can change it accordingly to overcome the issue of overlapping of sidebars.
7. Find the section:
<div id='main-wrapper'>
And just before this add:
<div id='left-sidebar-wrap'>
<b:section class='sidebar' id='left-sidebar' preferred='yes'/>
</div>
8. Save your template and "Wallah", its done. You have created an extra sidebar for your Blogger template.
Now you have to do some adjustments yourselves. Adjust the widths by altering the pixels (px) of the "outer-wrapper", "main-wrapper", "sidebar-wrapper" and "left-sidebar-wrap". Adjust the margins, paddings and width by same way to "header-wrapper" and "footer-wrapper" to match the style.
Awesome Tips To Resize And Edit Images On Blogger & Picasa
If you are using Blogger then all images you upload on your blog will be storeed in Picasa. Picasa is a Free Google Service. What does this mean ? when you create a blog, Picasa automatically create an Album for your blog.This album will have the same name as your blog. And all your hosted images are served with Google CDN.
Well, You have uploaded an Image to your Blog, Now you want to Resize it Down (Scale it Down). What should you do? You could :
1.Edit the Local Image in an Image Editor.
2.Resize the Image and Save in your Computer.
3.Upload again to Blogger.
But You are doing a lenthy process and you will have to upload the image to your blog again.
You could use the inbuilt Image Resizing feature in Blogger (Picasa) ?.
In this article you will learn utilizing the In-built Image Resizing Feature with some Additional tips.
Here, I have a sample Image with the dimensions 2000px x 2000px Here is the Direct link which is hosted on my Server.
Here I uploaded the image to Blogger and the Blogger Hosted image URL is
https://blogger.googleusercontent.com/img/b/R29vZ2xl/AVvXsEgm_GYwF8W3ydXN3aQJBjq7joNeEw3kwGQJ_QqMCLabvt7NSOA2nIZ74kCLpc4x4TimgVhzlE7PQSDS7D1UsiiuGc3_8aT1VCXBjYxk0pF3pjmD8jYXh5UXpr7vVQK19rg_ItsCq9TInhGi/s1600/sample-2000x2000.jpg
In the this url, observe the path before file name. which is Image size s1600 and it is the default blogger dimension.
What does this means, the image dimensions is 1600 on largest side.
WHAT IF THE IMAGE WIDTHS AND HEIGHTS ARE VARIOUS ?
The first sample image is 2000 pxiels wide on both sides. If i uploaded the image to blogger which is resized to 1600 pixels on both sides. Check the Below Image.
https://blogger.googleusercontent.com/img/b/R29vZ2xl/AVvXsEgm_GYwF8W3ydXN3aQJBjq7joNeEw3kwGQJ_QqMCLabvt7NSOA2nIZ74kCLpc4x4TimgVhzlE7PQSDS7D1UsiiuGc3_8aT1VCXBjYxk0pF3pjmD8jYXh5UXpr7vVQK19rg_ItsCq9TInhGi/s1600/sample-2000x2000.jpg
Here another Sample image which dimensions are 2000px x 1200px Here is the Direct Link and is hosted on my Server.
The Blogger Hosted Image is
https://blogger.googleusercontent.com/img/b/R29vZ2xl/AVvXsEiJgxeOvr11iFOxOCTGdUd1z2YWZGlIjCZQUmHZPxTSX13213bwWm4cGt373sUAlAdC__35rp8Rezj4GymswcjuRmjv-sjk6CntluueeLkA1YzVbBay5y85BDpAb2uyczmR0NmxmmldMJCj/s1600/sample-2000x1200.jpg
the above image width is 1600 and height is adjusted to corresponding to Original Image size ratio.
Another Example of Sample image which dimensions are 1200px x 2000px Here is the Direct Link and is hosted on my Server.
The Blogger Hosted Image is
https://blogger.googleusercontent.com/img/b/R29vZ2xl/AVvXsEjsE-tbRQ_k6q7DtGB_9fZ2qy_64O0BtNSV2E-LIeVZ6QecdA4z3DEexADM6QFb0y1H_2NaN6UfvE1EtuWUIKkuj0oZsOywmQTenqcIaZk1Sdelx_DuWjS6kzhAvG2ioWPRYW5XqoaMqzmg/s1600/sample-1200x2000.jpg
the above image height is 1600 and width is adjusted to corresponding to Original Image size ratio.
HOW TO RESIZE MY OWN IMAGES?
Upload the image to Blogger and get the Direct image link. If you want 250px width image, change s1600 to s250 (leading s is important and use any width you want.)
https://blogger.googleusercontent.com/img/b/R29vZ2xl/AVvXsEiJgxeOvr11iFOxOCTGdUd1z2YWZGlIjCZQUmHZPxTSX13213bwWm4cGt373sUAlAdC__35rp8Rezj4GymswcjuRmjv-sjk6CntluueeLkA1YzVbBay5y85BDpAb2uyczmR0NmxmmldMJCj/s250/sample-2000x1200.jpg
And now the image size is 250px width and hight is corresponding ratio to original image.
WHAT ABOUT IMAGE CROPPING ?
Picasa is also offering Image Cropping. which means, if you give a definitive image size, it will automatically cut the extra image on either sides and produce a perfect square image.
How To Crop Image ?
After changing the Image size just add the -c at end of image size. s200-c like so. take a look at image preview.
https://blogger.googleusercontent.com/img/b/R29vZ2xl/AVvXsEiJgxeOvr11iFOxOCTGdUd1z2YWZGlIjCZQUmHZPxTSX13213bwWm4cGt373sUAlAdC__35rp8Rezj4GymswcjuRmjv-sjk6CntluueeLkA1YzVbBay5y85BDpAb2uyczmR0NmxmmldMJCj/s100-c/sample-2000x1200.jpg
IS IT GREAT? WHERE SHOULD I USE THIS?
I use this tricks all the time.
For example the image is very large. if you want to place the image in your post. but your site loads very slow.
so use the crop trick. take a crop image and place in your post and link the image to Original Image.
<a href="https://blogger.googleusercontent.com/img/b/R29vZ2xl/AVvXsEiJgxeOvr11iFOxOCTGdUd1z2YWZGlIjCZQUmHZPxTSX13213bwWm4cGt373sUAlAdC__35rp8Rezj4GymswcjuRmjv-sjk6CntluueeLkA1YzVbBay5y85BDpAb2uyczmR0NmxmmldMJCj/s1600/sample-2000x1200.jpg">
<img src="" alt="https://blogger.googleusercontent.com/img/b/R29vZ2xl/AVvXsEiJgxeOvr11iFOxOCTGdUd1z2YWZGlIjCZQUmHZPxTSX13213bwWm4cGt373sUAlAdC__35rp8Rezj4GymswcjuRmjv-sjk6CntluueeLkA1YzVbBay5y85BDpAb2uyczmR0NmxmmldMJCj/s100-c/sample-2000x1200.jpg"/>
</a>

Here is a Preview
ADDITIONAL TIPS
TIP 1
If you paste the Normal image link in your browser, it will show the image.
https://blogger.googleusercontent.com/img/b/R29vZ2xl/AVvXsEgm_GYwF8W3ydXN3aQJBjq7joNeEw3kwGQJ_QqMCLabvt7NSOA2nIZ74kCLpc4x4TimgVhzlE7PQSDS7D1UsiiuGc3_8aT1VCXBjYxk0pF3pjmD8jYXh5UXpr7vVQK19rg_ItsCq9TInhGi/s1600/sample-2000x2000.jpg
But add the -d at end of image size. s1600-d like so, what will happen?
https://blogger.googleusercontent.com/img/b/R29vZ2xl/AVvXsEgm_GYwF8W3ydXN3aQJBjq7joNeEw3kwGQJ_QqMCLabvt7NSOA2nIZ74kCLpc4x4TimgVhzlE7PQSDS7D1UsiiuGc3_8aT1VCXBjYxk0pF3pjmD8jYXh5UXpr7vVQK19rg_ItsCq9TInhGi/s1600-d/sample-2000x2000.jpg
Instead of showing Image on browser, It show’s a download prompt box to download the image. which is cool to image galleries site, and you can give the downloadable image link to your visitors.
TIP 2
Here i found another picasa tip. Which is Video Embed Symbol. which add’s a Video Play Button Symbol to the image.
To get this, simple add the -o at end of image size. s420-o like so.
https://blogger.googleusercontent.com/img/b/R29vZ2xl/AVvXsEiJgxeOvr11iFOxOCTGdUd1z2YWZGlIjCZQUmHZPxTSX13213bwWm4cGt373sUAlAdC__35rp8Rezj4GymswcjuRmjv-sjk6CntluueeLkA1YzVbBay5y85BDpAb2uyczmR0NmxmmldMJCj/s420-o/sample-2000x1200.jpg
These are very useful tips and save lot of time on image resizing. i use them all the time when ever i need. Hope you enjoyed this tips. and PLEASE SHARE! Thanks!
Add Social Media Share Widget To Blogger - Mouse Hover Effect
Presenting yet another beautiful social media connect widget that lets your visitors to search your blog, subscribe to your RSS Feeds, follow you on twitter, follow you on Facebook and share your blog with over 351+ Social Media Networks! This widget is an extracted code from a wordpress template provided by Pbloggertemplates. I have further edited the widget to make it a perfect social share tool.
<div class='topsearch'>
<div class='clerfix' id='search'>
<form action='/search' id='searchform' method='get'>
<input id='s' name='q' onblur='if (this.value == "") {this.value = "Search here...";}' onfocus='if (this.value == "Search here...") {this.value = ""}' type='text' value='Search here...'/>
<input class='search-image' src='https://blogger.googleusercontent.com/img/b/R29vZ2xl/AVvXsEjAUg6wEvqZhkcyINXPj164pKhIxMgD75AY5ezTCvcOfhxRk9_QCkEve4n7cx3Kab0jZQFwv4IK62ljXemuRvvTgTTfrFUEqRLsshcTsoPUWRptsXOgUbYBqzLE7RfpbQVo-TPFQjdre58/s1600/search.png' title='Search' type='image'/>
</form>
</div>
</div>
<div style='clear:both;'/>
<div class='social-connect-widget' style='margin-top:0px;margin-bottom:10px;'>
<a expr:href='data:blog.homepageUrl + "feeds/posts/default"'><img alt='RSS Feed' src='https://blogger.googleusercontent.com/img/b/R29vZ2xl/AVvXsEhMtpoWlyKk1G5H925C1nzekZAuHbeDrp6Av_714F1i6X2tGnR2mKW2Cvpa28PjUIgg3aQ4Spn2ZDA3X7RZFxpWNeW-dT1xgx2hjChJbRndjYN3-5BIReSYYWmjy2yMR4G-cNAoaReHLLYg/s1600/social-connect-rss.png' title='RSS Feed'/></a><a expr:href='data:blog.homepageUrl + "feeds/posts/default"'>Subscribe to our RSS Feeds!</a>
</div>
<div class='social-connect-widget' style='margin-bottom:10px;'>
<a href='http://twitter.com/USERNAME'><img alt='Follow Us on Twitter!' src='https://blogger.googleusercontent.com/img/b/R29vZ2xl/AVvXsEgYnwRe07IC8bEqFdy_eS4qCcfCnjC8pSlf3ZLmTn5D9_3gG_BvLPhOJYom07TOyKJwZD9skMPdU5EnfFJHGRs64SfqPCaN6CejhIekK8NQBvDE7RnIK1uVfTP5t5z0YTVr44FqbuzSzkT0/s1600/social-connect-twitter.png' title='Follow Us on Twitter!'/></a><a href='http://twitter.com/USERNAME'>Follow Us on Twitter!</a>
</div>
<div class='social-connect-widget' style='margin-bottom:10px;'>
<a href='http://facebook.com/USERNAME'><img alt='Be Our Fan!' src='https://blogger.googleusercontent.com/img/b/R29vZ2xl/AVvXsEiBPP4SJH01aFv64bJGH7v-VMyjHGMc9-PMgo3t8-EJBAw56_Cmz6gNL9h5RTBOZyI836yJXOzyBW8eAkG_2aXYj82PXPktlM0I90lF3XBr4zrha1hE_2tQJfa7ZJNSiXbVIyXNv25fkqix/s1600/social-connect-facebook.png' title='Be Our Fan'/></a><a href='http://facebook.com/USERNAME'>Follow us on Facebook!</a>
</div>
<div style='clear:both;'/>
<div class='addthis_toolbox'>
<div class='custom_images'>
<a class='addthis_button_twitter'><img alt='Twitter' height='32' src='https://blogger.googleusercontent.com/img/b/R29vZ2xl/AVvXsEgBMsoJc6pGWJj0b2iJKIub6ynvAD0dJzCLNTxbF8QgiOVFljh23EyObYJoIJS8ewFggwcatLQQz7IhUdXpl3YfaY1miQwYQ5TC6sBUkzj5e8jelh3w_h7oRcZ0o1UaYA-imG49lHxMw64/s1600/twitter.png' width='32'/></a>
<a class='addthis_button_delicious'><img alt='Delicious' height='32' src='https://blogger.googleusercontent.com/img/b/R29vZ2xl/AVvXsEgYH3J_N1GwoDtzZEHvgs-mzkKwZW89aHtZjwWx7AEVqOc3Ud5QFpNUiPWDl4OGck5vvGOtoVd4GOZ6S6muN741y5gAMcdGe9HOJIB39WAyIumGWnuTg69k1Ze1gQK-2s8-TLo-nIs0z14/s1600/delicious.png' width='32'/></a>
<a class='addthis_button_facebook'><img alt='Facebook' height='32' src='https://blogger.googleusercontent.com/img/b/R29vZ2xl/AVvXsEhBnPzaKEf5MEXCasxISsiupGWbzWJDFGLQgnfzxr1CJ3KAQYNRCtTY1UFuqnY_3b3w9_zZNsX1Vox_JcIv5VisaNUEJlyTg0yl5Q3BSUMLtTznxnyFk1ZLdDW1PTsaXiX2KL-Dln3dAQA/s1600/facebook.png' width='32'/></a>
<a class='addthis_button_digg'><img alt='Digg' height='32' src='https://blogger.googleusercontent.com/img/b/R29vZ2xl/AVvXsEhfLdLzAuu4JKy2DIZpkEeFoSyD_1_nYOnuE0kvOP2ioTkS4B2YE2ZFL4P9G6lEq3WZ3t71cnogq0G6vimW73LQxsg7HuPdGDo__R1A3EVgA87z5cNj60sJP11b9ue1PtTOhBpylKgfods/s1600/digg.png' width='32'/></a>
<a class='addthis_button_stumbleupon'><img alt='Stumbleupon' height='32' src='https://blogger.googleusercontent.com/img/b/R29vZ2xl/AVvXsEjFArhJ3QUOghLtJ_NNsszgfonLG_K2ZTL7Qhz6buKS0s1xg3XgT7dN4D_JO23wgdcI8_Iezs1doZ1NlPCrxmlItuv9XDLuiUVQ0epU17u1Bsr3Gl13Xz3Q5CQYKDiwbE7pYOPfPEMn1pE/s1600/stumbleupon.png' width='32'/></a>
<a class='addthis_button_favorites'><img alt='Favorites' height='32' src='https://blogger.googleusercontent.com/img/b/R29vZ2xl/AVvXsEheoWARHtx9gO_cEkkvr69dB21EuJrvzU9XXSj86ZyvVHiIG_b_JpKlBy-ysunzbW3MSIi9Y3U3_D88kNVILR8NQth48EvQLU0A-DWVtVgsLT_xj2FySVFc68TJqfbAiuHF6VaLBEt0tSg/s1600/favorites.png' width='32'/></a>
<a class='addthis_button_more'><img alt='More' height='32' src='https://blogger.googleusercontent.com/img/b/R29vZ2xl/AVvXsEjljDXCc_sJ68aux0fZYtOsSs9HTHaZawwqanmya5iwnTWmBnm1NwiQBk-ra8GZ_h0ACo6q9liEsVY14KmOZJt9lanqhjnA6CX4MLiJ84dVAQPiNuQMzVo5kCRbRVp4t_ylPubfP17zrtY/s1600/more.png' width='32'/></a>
</div>
<script src='http://s7.addthis.com/js/250/addthis_widget.js' type='text/javascript'/>
</div>
<div style='clear:both;'/>
* Replace http://twitter.com/USERNAME with your twitter profile link
* Replace http://facebook.com/USERNAME with your Facebook Profile link
6. Save your template and Bingo you are done! :>
Visit your blogs to see a beautiful new change. Hope you liked it. Questions are always welcomed.
Adding The Social Connect Widget To BlogSpot
- Go To Blogger > Design > Edit HTML
- Backup your template
- Search for ]]></b:skin> and paste the following code just above it,
#search{width:350px; border:1px solid #E0DFD9;background:url(https://blogger.googleusercontent.com/img/b/R29vZ2xl/AVvXsEi_it7ln6FivZmaqhRWsP6kXkSGatr-wRAtEfqA7S0ynIvrkRSuaue2SCdrwrjmKb7AZzSheNZM3tolTY3L7Ta4sNHKvVNxessNU18pDEWD4v8T60EPVovmDF-bCq6emXuE6oQdvw8tBWM/s1600/search-bg.png) left top repeat-x;height:32px;padding:0;text-align:left;overflow:hidden}
#search #s{width:80%; background:none;color:#3F3F3F;border:0;padding:4px;margin:3px 0 0 12px;float:left}
#search .search-image{border:0;vertical-align:top;float:right;margin:8px 4px 0 2px}
#search-wrap{padding:15px 0}
.topsearch #search{margin-top:0;margin-bottom:10px}
.social-connect-widget{background:#FFF;border:1px solid #E7E6DE;padding:10px}
.social-connect-widget:hover{border:1px solid #CBCBC2;background:#F5F4EF}
.social-connect-widget a{text-decoration:none;font-weight:bold;font-family:Arial,Helvetica,Sans-serif;color:#4B4D4E}
.social-connect-widget a:hover{text-decoration:underline;color:#F77C04}
.social-connect-widget img{vertical-align:middle;margin-right:5px}
Change width of search box edit width:350px
Change width of search input area edit width:80%
4. Then Search for,
PS: In this part most of you will face problems as the coding for each template differ. If you could not find this code then do not panic and simply post your Blog URL in the comments.
5. Now Paste the following code just below it,
<div class='topsearch'>
<div class='clerfix' id='search'>
<form action='/search' id='searchform' method='get'>
<input id='s' name='q' onblur='if (this.value == "") {this.value = "Search here...";}' onfocus='if (this.value == "Search here...") {this.value = ""}' type='text' value='Search here...'/>
<input class='search-image' src='https://blogger.googleusercontent.com/img/b/R29vZ2xl/AVvXsEjAUg6wEvqZhkcyINXPj164pKhIxMgD75AY5ezTCvcOfhxRk9_QCkEve4n7cx3Kab0jZQFwv4IK62ljXemuRvvTgTTfrFUEqRLsshcTsoPUWRptsXOgUbYBqzLE7RfpbQVo-TPFQjdre58/s1600/search.png' title='Search' type='image'/>
</form>
</div>
</div>
<div style='clear:both;'/>
<div class='social-connect-widget' style='margin-top:0px;margin-bottom:10px;'>
<a expr:href='data:blog.homepageUrl + "feeds/posts/default"'><img alt='RSS Feed' src='https://blogger.googleusercontent.com/img/b/R29vZ2xl/AVvXsEhMtpoWlyKk1G5H925C1nzekZAuHbeDrp6Av_714F1i6X2tGnR2mKW2Cvpa28PjUIgg3aQ4Spn2ZDA3X7RZFxpWNeW-dT1xgx2hjChJbRndjYN3-5BIReSYYWmjy2yMR4G-cNAoaReHLLYg/s1600/social-connect-rss.png' title='RSS Feed'/></a><a expr:href='data:blog.homepageUrl + "feeds/posts/default"'>Subscribe to our RSS Feeds!</a>
</div>
<div class='social-connect-widget' style='margin-bottom:10px;'>
<a href='http://twitter.com/USERNAME'><img alt='Follow Us on Twitter!' src='https://blogger.googleusercontent.com/img/b/R29vZ2xl/AVvXsEgYnwRe07IC8bEqFdy_eS4qCcfCnjC8pSlf3ZLmTn5D9_3gG_BvLPhOJYom07TOyKJwZD9skMPdU5EnfFJHGRs64SfqPCaN6CejhIekK8NQBvDE7RnIK1uVfTP5t5z0YTVr44FqbuzSzkT0/s1600/social-connect-twitter.png' title='Follow Us on Twitter!'/></a><a href='http://twitter.com/USERNAME'>Follow Us on Twitter!</a>
</div>
<div class='social-connect-widget' style='margin-bottom:10px;'>
<a href='http://facebook.com/USERNAME'><img alt='Be Our Fan!' src='https://blogger.googleusercontent.com/img/b/R29vZ2xl/AVvXsEiBPP4SJH01aFv64bJGH7v-VMyjHGMc9-PMgo3t8-EJBAw56_Cmz6gNL9h5RTBOZyI836yJXOzyBW8eAkG_2aXYj82PXPktlM0I90lF3XBr4zrha1hE_2tQJfa7ZJNSiXbVIyXNv25fkqix/s1600/social-connect-facebook.png' title='Be Our Fan'/></a><a href='http://facebook.com/USERNAME'>Follow us on Facebook!</a>
</div>
<div style='clear:both;'/>
<div class='addthis_toolbox'>
<div class='custom_images'>
<a class='addthis_button_twitter'><img alt='Twitter' height='32' src='https://blogger.googleusercontent.com/img/b/R29vZ2xl/AVvXsEgBMsoJc6pGWJj0b2iJKIub6ynvAD0dJzCLNTxbF8QgiOVFljh23EyObYJoIJS8ewFggwcatLQQz7IhUdXpl3YfaY1miQwYQ5TC6sBUkzj5e8jelh3w_h7oRcZ0o1UaYA-imG49lHxMw64/s1600/twitter.png' width='32'/></a>
<a class='addthis_button_delicious'><img alt='Delicious' height='32' src='https://blogger.googleusercontent.com/img/b/R29vZ2xl/AVvXsEgYH3J_N1GwoDtzZEHvgs-mzkKwZW89aHtZjwWx7AEVqOc3Ud5QFpNUiPWDl4OGck5vvGOtoVd4GOZ6S6muN741y5gAMcdGe9HOJIB39WAyIumGWnuTg69k1Ze1gQK-2s8-TLo-nIs0z14/s1600/delicious.png' width='32'/></a>
<a class='addthis_button_facebook'><img alt='Facebook' height='32' src='https://blogger.googleusercontent.com/img/b/R29vZ2xl/AVvXsEhBnPzaKEf5MEXCasxISsiupGWbzWJDFGLQgnfzxr1CJ3KAQYNRCtTY1UFuqnY_3b3w9_zZNsX1Vox_JcIv5VisaNUEJlyTg0yl5Q3BSUMLtTznxnyFk1ZLdDW1PTsaXiX2KL-Dln3dAQA/s1600/facebook.png' width='32'/></a>
<a class='addthis_button_digg'><img alt='Digg' height='32' src='https://blogger.googleusercontent.com/img/b/R29vZ2xl/AVvXsEhfLdLzAuu4JKy2DIZpkEeFoSyD_1_nYOnuE0kvOP2ioTkS4B2YE2ZFL4P9G6lEq3WZ3t71cnogq0G6vimW73LQxsg7HuPdGDo__R1A3EVgA87z5cNj60sJP11b9ue1PtTOhBpylKgfods/s1600/digg.png' width='32'/></a>
<a class='addthis_button_stumbleupon'><img alt='Stumbleupon' height='32' src='https://blogger.googleusercontent.com/img/b/R29vZ2xl/AVvXsEjFArhJ3QUOghLtJ_NNsszgfonLG_K2ZTL7Qhz6buKS0s1xg3XgT7dN4D_JO23wgdcI8_Iezs1doZ1NlPCrxmlItuv9XDLuiUVQ0epU17u1Bsr3Gl13Xz3Q5CQYKDiwbE7pYOPfPEMn1pE/s1600/stumbleupon.png' width='32'/></a>
<a class='addthis_button_favorites'><img alt='Favorites' height='32' src='https://blogger.googleusercontent.com/img/b/R29vZ2xl/AVvXsEheoWARHtx9gO_cEkkvr69dB21EuJrvzU9XXSj86ZyvVHiIG_b_JpKlBy-ysunzbW3MSIi9Y3U3_D88kNVILR8NQth48EvQLU0A-DWVtVgsLT_xj2FySVFc68TJqfbAiuHF6VaLBEt0tSg/s1600/favorites.png' width='32'/></a>
<a class='addthis_button_more'><img alt='More' height='32' src='https://blogger.googleusercontent.com/img/b/R29vZ2xl/AVvXsEjljDXCc_sJ68aux0fZYtOsSs9HTHaZawwqanmya5iwnTWmBnm1NwiQBk-ra8GZ_h0ACo6q9liEsVY14KmOZJt9lanqhjnA6CX4MLiJ84dVAQPiNuQMzVo5kCRbRVp4t_ylPubfP17zrtY/s1600/more.png' width='32'/></a>
</div>
<script src='http://s7.addthis.com/js/250/addthis_widget.js' type='text/javascript'/>
</div>
<div style='clear:both;'/>
* Replace http://twitter.com/USERNAME with your twitter profile link
* Replace http://facebook.com/USERNAME with your Facebook Profile link
6. Save your template and Bingo you are done! :>
Visit your blogs to see a beautiful new change. Hope you liked it. Questions are always welcomed.
Facebook Send Button for Blogger
Send button by Facebook enables your blog readers to send your content to their Facebook friends privately in their inbox or to the group wall or to any email address. Let’s see how to add Send button to Blogger.
If you have previously followed the tutorial of Facebook XFBML Like button for Blogger then skip first 3 steps as you don’t require it. Otherwise:
Step 1: Go to Design > Edit HTML tab and check “Expand Widget Templates”.
Step 2: Find the attribution:
<html ...... xmlns:expr='http://www.google.com/2005/gml/expr'>
And add the namespace attribute of Facebook after it so that it works with Internet Explorer:
xmlns:fb='http://ogp.me/ns/fb#'
The full attribution will look like:
<html ...... xmlns:expr='http://www.google.com/2005/gml/expr' xmlns:fb='http://ogp.me/ns/fb#'>
Step 3: Find
<body>
Or
<body expr:class='"loading" + data:blog.mobileClass'>
For templates based on blogger's Template Designer and immediately after it add:
<div id='fb-root'/>
<script>(function(d, s, id) {
  var js, fjs = d.getElementsByTagName(s)[0];
  if (d.getElementById(id)) {return;}
  js = d.createElement(s); js.id = id;
  js.src = "//connect.facebook.net/en_US/all.js#xfbml=1";
  fjs.parentNode.insertBefore(js, fjs);
}(document, 'script', 'facebook-jssdk'));</script>
Step 4: Find
<data:post.body/> and immediately after/before it (or both) add:<b:if cond='data:blog.pageType != "static_page"'> <div class='like'><fb:send expr:href="data:post.canonicalUrl" font="arial"></fb:send></div></b:if>
Step 5: Save you template.
Customize Send Button Attributes
font- The font to used by the button. I have used "arial" as default. The other options are: 'arial', 'lucida grande', 'segoe ui', 'tahoma', 'trebuchet ms', 'verdana'colorscheme- The color of the "Send" button. The default I used is light. If you have a darker background then add:colorscheme="dark"
Let’s see two live examples with attribution set:
For this above Send button, the code is shown in step 4.
<fb:send expr:href="data:post.canonicalUrl" font="trebuchet ms" colorscheme="dark"></fb:send>
Conclusion
- If you ask me, I will prefer the XFBML version of “Like” because it will give you both the options to “Like” and “Send”.
- Conditional tags marked in blue are used to show it every page excluding static page. Replacing these tags with below codes will let it to be seen in post pages only.
<b:if cond='data:blog.pageType == "item"'> Facebook Send button code goes here... </b:if>
Optimize Your Blog Post Titles for Better SEO
If you are also using a template from Blogger then you need to make some changes on it to fit your needs and also to fit the search engine needs. Normally search engine don’t focus on the markup importantly but it’s a good thing to change it to something user friendly. What Blogger templates like ‘Simple’, Travel’ etc. have h1 tag as it’s Blog title, which is normal. But the Post title is not okay that all, it is in an h3 tag, for many reasons your blog might not being shown up in the search results and this is on of those reasons.
You won’t find any difficulties with a WordPress theme, as they are freshly published and reviewed by experts but templates in Blogger were made by expert but not freshly launched. Just as the search engines detects an anchor link because of it’s markup then why can’t they see what heading is being used for what area.
OPTIMIZE THE POST TITLE TO HEADING2 IN BLOGGER
Enough about it’s effect, let’s talk about how to make the changes applicable. These easy instruction will give you the easiest way to turn your post title to h2 from h3.
1.First of all login to your Blogger Dashboard
2.Go to the Template tab and click on Edit HTML, ignore the warning and proceed.
3.Check mark the ‘Expand Widget Template’
4.Use CTRL+F and search for this line
<h3 class='post-title entry-title' itemprop='name'>
5.All you have to do is just change the <h3> to <h2>, change of only a number. But we aren’t done yet, remember there’s still an ending/closing tag. You have to change both starting <h3> and ending </h3> tag into the template. In the middle it’s all XML codes that works on the server to serve an HTML page.

After you turn the starting h3 to h2, do remember to change the ending tag too or it will create difficulties while saving the template.
6.You will find the tag two times. one is for Desktop Version Template and another is for Mobile version Template. I recommend you to change all h3 that marks as the post title to h2. Searching for <h3 will bring up the codes but as i already said, remember to change corresponding closing tag too.
Yeah that’s it ! It doesn’t only increase visibility and beauty of your blog in search results but also make your blog user friendly. Now stop using h3 for your post title, h3 is only good in the post body for heading. This was not a big change or addition for better SEO in your blog but remember it is how SEO works, there’s no easy and direct way to get to the top of search results, small and effective actions you take regarding your blog makes it a hit on SEO and search engines.
Don’t get worried if your blog don’t do too good in the search results, keep posting and that’s the most important aspect in getting to the top. And this blog is always free to read, check post related to Blogger SEO for some more amazing post and do subscribe for our coming posts.
Tag :
bloggertips,
seo
How to Hide / Remove Status Message Bar in Blogger Blogs
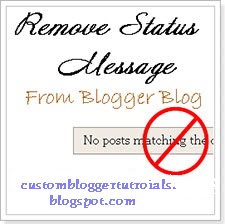 What is “Status Message Bar” in Blogger Blog?
In Search pages or in Label Pages You can observe a Bar with some message at the top of posts.
that is Status Message Bar.
You can Remove or Hide this message by following simple tricks
- By adding CSS code.
- By removing template code.
How to remove this Bar by CSS.
1.Go to Blogger Dashboard > Design tab > Edit HTML
2.Find ]]></b:skin> tag
3.Add the following code before it and save your template
.status-msg-wrap{display:none !important;}
By Removing Template Code.
1.Go to Blogger Dashboard > Design tab > Edit HTML
2.Check Expand Widget Templates Check Box
3.Then find Following code and remove it from template
<b:include data='top' name='status-message'/>
4.Finally Save your Template
The Status Message Bar must Disappeared from your Blog.
How To Add A CSS3 Thread Out Social Sharing Widget

The widget appears as a simple grey circle with the word ‘Share’ written inside it but once you hover your mouse cursor over it, four share buttons appear spinning and zooming out of it: a Facebook ‘Like’ button, a Google +1 button, a Tweet button and a ShareThis button.
Check out the live demo.
Here’s how you can install it to your blog:
In your Blogger dashboard, go to Design and then click on Edit HTML.
Check the Expand Template widgets box.
Search for the following tag or line of code by pressing Ctrl+F.
<div class=’post-footer-line post-footer-line-1’>
Copy/paste this CSS/JavaScript code immediately right after/below it:
<b:if cond='data:blog.pageType == "item"'>
<style type="text/css">
.ringMenu {
width: 100px;
margin: 150px auto;
}
.ringMenu ul {
list-style: none;
position: relative;
width: 100px;
color: white;
}
.ringMenu ul a {
color: white;
}
.ringMenu ul li {
-webkit-transition: all 0.3s ease-in-out;
-moz-transition: all 0.3s ease-in-out;
-o-transition: all 0.3s ease-in-out;
-ms-transition: all 0.3s ease-in-out;
transition: all 0.3s ease-in-out;
}
.ringMenu ul li a {
display: block;
width: 100px;
height: 100px;
background: rgba(50,50,50,0.7);
text-align: center;
line-height: 100px;
-webkit-border-radius: 50px;
border-radius: 50px;
font-size: 20px;
}
.ringMenu ul li a:hover {
background: rgba(230,150,20,0.7);
text-decoration: none;
}
.ringMenu ul li:not(.main) {
-webkit-transform: rotate(-180deg) scale(0);
-moz-transform: rotate(-180deg) scale(0);
-o-transform: rotate(-180deg) scale(0);
transform: rotate(-180deg) scale(0);
opacity: 0;
}
.ringMenu:hover ul li {
-webkit-transform: rotate(0) scale(1);
-moz-transform: rotate(0) scale(1);
-o-transform: rotate(0) scale(1);
transform: rotate(0) scale(1);
opacity: 1;
}
.ringMenu ul li.top {
-webkit-transform-origin: 50% 152px;
-moz-transform-origin: 50% 152px;
-o-transform-origin: 50% 152px;
transform-origin: 50% 152px;
position: absolute;
top: -70px;
left: 50px;
}
.ringMenu ul li.bottom {
-webkit-transform-origin: 50% -52px;
-moz-transform-origin: 50% -52px;
-o-transform-origin: 50% -52px;
transform-origin: 50% -52px;
position: absolute;
bottom: -70px;
left: 50px;
}
.ringMenu ul li.right {
-webkit-transform-origin: -52px 50%;
-moz-transform-origin: -52px 50%;
-o-transform-origin: -52px 50%;
transform-origin: -52px 50%;
position: absolute;
top: 10px;
right: -50px;
}
.ringMenu ul li.left {
-webkit-transform-origin: 152px 50%;
-moz-transform-origin: 152px 50%;
-o-transform-origin: 152px 50%;
transform-origin: 152px 50%;
position: absolute;
top: 10px;
left: -50px;
}
</style>
<div>
<script type="text/javascript">var switchTo5x=false;</script>
<script type="text/javascript" src="http://w.sharethis.com/button/buttons.js"></script>
<script type="text/javascript">stLight.options({publisher: "ur-e9856caa-8f3b-40a6-82af-461e390fe167"});</script>
<ul>
<li><a href="#main">SHARE</a></li>
<li><span class='st_fblike_vcount' displayText='Like'></span></li>
<li><span class='st_sharethis_vcount' displayText='Share'></span></li>
<li><span class='st_plusone_vcount' displayText='+1'></span></li>
<li><span class='st_twitter_vcount' displayText='Tweet'></span></li>
</ul>
</div>
</b:if>
Save your template and that’s it. You’re done!
.jpg)

.jpg)