Showing posts with label template. Show all posts
Replace Threaded Comments With Google + Comments in Blogger
.jpg) I hope that you might be familiar with the latest commenting system Google has introduced that integrates Google+ comments with Blogger blogs. This new commenting system is a major improvement over the default Blogger system, and it supports threaded comments. It also looks a lot better. We earlier shared a tutorial on how to enable this new Google Plus commenting system for Blogger blogs. But some people still have problems implementing it on custom templates. For them, we have compiled this short tutorial on how to effectively implement and use this new improved commenting system.
I hope that you might be familiar with the latest commenting system Google has introduced that integrates Google+ comments with Blogger blogs. This new commenting system is a major improvement over the default Blogger system, and it supports threaded comments. It also looks a lot better. We earlier shared a tutorial on how to enable this new Google Plus commenting system for Blogger blogs. But some people still have problems implementing it on custom templates. For them, we have compiled this short tutorial on how to effectively implement and use this new improved commenting system.Switching To Google + Comments
To enable Google Plus comments for your Blogger blog, you will first have to connect your account to your Google+ account. To do this, just follow these steps.
- Log into your Blogger dashboard, and choose a blog you want to connect
- Click on the Google+ button from the left sidebar
- Click on the Get Started button on the top-left side to connect your account. This will not appear if your account is already linked.
- Follow the simple instructions to connect your blog.
- Once connected, you will see an option Use Google+ comments on this blog. Checking this will enable the new Google Plus commenting system.
Displaying Google comments on custom templates
To do that, you can revert your Blog Widget to defaults in your template HTML editor via the following steps.
- From inside your blog's dashboard, click on Template from the left sidebar.
- Click on Edit HTML
(Before moving on, we'd suggest you backup your template, just in case anything goes wrong)
- Click on the Revert Widget templates to defaults button
- Now, Be careful to select Blog1 Widget from the list. Do not select any other, as it will reset other widgets to default as well.
<b:if cond='data:blog.pageType == & quot;static_page"'><b:if cond='data:post.showThreadedComments'><b:include data='post' name='threaded_comments'/><b:else/><b:include data='post' name='comments'/></b:if></b:if><b:if cond='data:blog.pageType == & quot;item"'><b:if cond='data:post.showThreadedComments'><b:include data='post' name='threaded_comments'/><b:else/><b:include data='post' name='comments'/></b:if></b:if>
Carefully look at the bolded code, and then replace them with the following line of code.
<b:include data='post' name='comment_picker'/>
If you want to display comment count, you can simply modify the above line of code
<b:include data='post' name='comment_picker'/>
Still not working? Please feel free to mention your queries in the comments below. And please try to be as relevant as possible. Thank you :)
How to Enable Google + Comments on Custom Blogger Templates

Enabling Google Plus comments
To Enable Google + Comments on blogger,first log into your Blogger account, and click on the blog you want to add Google Plus comments to. Now, click on the Google+ option on the left sidebar. You must be the admin of a blog to be able to view this option.
Now, you need to upgrade our account, and integrate it with Google Plus if you haven't already done so. You will get a "Get Started" button if you haven't. Follow the simple instructions, and then move on to the next step.
Check the option that says Use Google+ Comments on this Blog - For default templates, this is pretty much all you need to do.
 For custom templates, here's what you need to do;
- Click on the Template tab from the left sidebar, and then click on Edit HTML.
- From the code editor, press Ctrl + F, and search for the following line of code
<div class='comments' id='comments'>
- After the above code Just paste the Below Code.
<div class='cmt_iframe_holder' expr:data-href='data:post.canonicalUrl'expr:data-viewtype=' data:post.viewType'/>

Take care not to make a mistake while editing. And it would be a good idea to backup your template (Backup/Restore option at the top-right), just in case.
For comments to work on custom templates, you need to add the code as well as to enable it.

How to add "Reply Button or Link" to Blogger Blog.
As you see on websites ,whether like youtube or forums,all these great websites have reply link attached to every comment published .Fortunately we can also ad reply link to our blogger blogs.
How to add "Reply Button or Link" to Blogger Blog.
- Go to Blogger > Select your Blog >Template > Edit Html.
- Back up your template first.
- Tick the " Expand Widgets" Box on the left top of html editor.
- Search For ]]></b:skin>
- And Paste the Below Code Just above it.
/*--------------CBT Reply Link --------------*/.MBT-replycomments{background:#ECEAEA;cursor:pointer;color:#fff;margin:5px 0;float:right;border:none;padding:4px;-moz-border-radius:6px;-webkit-border-radius:6px;border-radius:6px;font:10px sans-serif;}.MBT-replycomments:hover{background:#E7E7E7;}
Make these Changes
- To Change the Link background on active mode edit #ECEAEA
- To Change the Link Background color on mouse hover edit #E7E7E7
- MBT Color Generator tool will be helpful
7. And just above it paste the below code
<dd class='comment-footer'>
<div class='CBT-replycomments'><a expr:href='"https://www.blogger.com/comment.g?blogID=*******************&postID=" + data:post.id + "&isPopup=true&postBody=%40%3C%61%20%68%72%65%66%3D%22%23" + data:comment.anchorName + "%22%3E" + data:comment.author + "%3C%2F%61%3E#form"' onclick='javascript:window.open(this.href, "bloggerPopup", "toolbar=0,location=0,statusbar=1,menubar=0,scrollbars=yes,width=650,height=650"); return false;'>Reply</a></div>
- You can change "Reply" text with your desired one.
- Replace with your BLOG ID. If your are logged into your blogger account then look at your browser address bar. You can clearly see a 18-19 digit code. Just copy it and paste it in place of *******************
- You can find "Blog ID" as shown below in the image

8. Save your template and you are done
Note:
I did not create the code.This code is create BY Mohammad Mustafa Ahmed Zai .
Who is the Admin of Mybloggertricks
How to Create Three Column Template For Blogger
You must have seen many blogs having three columns. You may also want to make your own three column Blogger Layout Template and give your blog a new level in style. So let's do it with a simple tutorial.
You can see in Design > Page elements that you already have two column, one for the main body and the other is the sidebar. So you need to create and add an extra sidebar column.
Adding the Third Sidebar Column in Blogger Template

1. Go to Design > Edit Template and backup your template.
2. Find:
#sidebar-wrapper {
width: 220px;
float: $endSide;
word-wrap: break-word; /* fix for long text breaking sidebar float in IE */
overflow: hidden; /* fix for long non-text content breaking IE sidebar float */
And change float to:
float: right;
3. Below it add:
#left-sidebar-wrap {
width: 220px;
float: left;
word-wrap: break-word;
overflow: hidden;
}
This "float: left" will make the sidebar float to left. Thus you will be having a sidebar to the left of your blogger template.
4. Find and change the width of the outer-wrapper to 900px or more to avoid overlapping of sidebar over the main-wrapper
#outer-wrapper {
width: 660px;
margin:0 auto;
padding:10px;
text-align:$startSide;
font: $bodyfont;
}
5. Find #main-wrapper and replace it with:
#main-wrapper {
width: 410px;
float: left;
margin:0 20px;
word-wrap: break-word; /* fix for long text breaking sidebar float in IE */
overflow: hidden; /* fix for long non-text content breaking IE sidebar float */
}
Here a margin to left and right of 20px is added to avoid overlapping of sidebars with the main wrapper. You can change it accordingly to overcome the issue of overlapping of sidebars.
7. Find the section:
<div id='main-wrapper'>
And just before this add:
<div id='left-sidebar-wrap'>
<b:section class='sidebar' id='left-sidebar' preferred='yes'/>
</div>
8. Save your template and "Wallah", its done. You have created an extra sidebar for your Blogger template.
Now you have to do some adjustments yourselves. Adjust the widths by altering the pixels (px) of the "outer-wrapper", "main-wrapper", "sidebar-wrapper" and "left-sidebar-wrap". Adjust the margins, paddings and width by same way to "header-wrapper" and "footer-wrapper" to match the style.
How to Hide / Remove Status Message Bar in Blogger Blogs
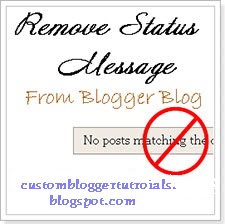 What is “Status Message Bar” in Blogger Blog?
In Search pages or in Label Pages You can observe a Bar with some message at the top of posts.
that is Status Message Bar.
You can Remove or Hide this message by following simple tricks
- By adding CSS code.
- By removing template code.
How to remove this Bar by CSS.
1.Go to Blogger Dashboard > Design tab > Edit HTML
2.Find ]]></b:skin> tag
3.Add the following code before it and save your template
.status-msg-wrap{display:none !important;}
By Removing Template Code.
1.Go to Blogger Dashboard > Design tab > Edit HTML
2.Check Expand Widget Templates Check Box
3.Then find Following code and remove it from template
<b:include data='top' name='status-message'/>
4.Finally Save your Template
The Status Message Bar must Disappeared from your Blog.
How To Add A CSS3 Thread Out Social Sharing Widget

The widget appears as a simple grey circle with the word ‘Share’ written inside it but once you hover your mouse cursor over it, four share buttons appear spinning and zooming out of it: a Facebook ‘Like’ button, a Google +1 button, a Tweet button and a ShareThis button.
Check out the live demo.
Here’s how you can install it to your blog:
In your Blogger dashboard, go to Design and then click on Edit HTML.
Check the Expand Template widgets box.
Search for the following tag or line of code by pressing Ctrl+F.
<div class=’post-footer-line post-footer-line-1’>
Copy/paste this CSS/JavaScript code immediately right after/below it:
<b:if cond='data:blog.pageType == "item"'>
<style type="text/css">
.ringMenu {
width: 100px;
margin: 150px auto;
}
.ringMenu ul {
list-style: none;
position: relative;
width: 100px;
color: white;
}
.ringMenu ul a {
color: white;
}
.ringMenu ul li {
-webkit-transition: all 0.3s ease-in-out;
-moz-transition: all 0.3s ease-in-out;
-o-transition: all 0.3s ease-in-out;
-ms-transition: all 0.3s ease-in-out;
transition: all 0.3s ease-in-out;
}
.ringMenu ul li a {
display: block;
width: 100px;
height: 100px;
background: rgba(50,50,50,0.7);
text-align: center;
line-height: 100px;
-webkit-border-radius: 50px;
border-radius: 50px;
font-size: 20px;
}
.ringMenu ul li a:hover {
background: rgba(230,150,20,0.7);
text-decoration: none;
}
.ringMenu ul li:not(.main) {
-webkit-transform: rotate(-180deg) scale(0);
-moz-transform: rotate(-180deg) scale(0);
-o-transform: rotate(-180deg) scale(0);
transform: rotate(-180deg) scale(0);
opacity: 0;
}
.ringMenu:hover ul li {
-webkit-transform: rotate(0) scale(1);
-moz-transform: rotate(0) scale(1);
-o-transform: rotate(0) scale(1);
transform: rotate(0) scale(1);
opacity: 1;
}
.ringMenu ul li.top {
-webkit-transform-origin: 50% 152px;
-moz-transform-origin: 50% 152px;
-o-transform-origin: 50% 152px;
transform-origin: 50% 152px;
position: absolute;
top: -70px;
left: 50px;
}
.ringMenu ul li.bottom {
-webkit-transform-origin: 50% -52px;
-moz-transform-origin: 50% -52px;
-o-transform-origin: 50% -52px;
transform-origin: 50% -52px;
position: absolute;
bottom: -70px;
left: 50px;
}
.ringMenu ul li.right {
-webkit-transform-origin: -52px 50%;
-moz-transform-origin: -52px 50%;
-o-transform-origin: -52px 50%;
transform-origin: -52px 50%;
position: absolute;
top: 10px;
right: -50px;
}
.ringMenu ul li.left {
-webkit-transform-origin: 152px 50%;
-moz-transform-origin: 152px 50%;
-o-transform-origin: 152px 50%;
transform-origin: 152px 50%;
position: absolute;
top: 10px;
left: -50px;
}
</style>
<div>
<script type="text/javascript">var switchTo5x=false;</script>
<script type="text/javascript" src="http://w.sharethis.com/button/buttons.js"></script>
<script type="text/javascript">stLight.options({publisher: "ur-e9856caa-8f3b-40a6-82af-461e390fe167"});</script>
<ul>
<li><a href="#main">SHARE</a></li>
<li><span class='st_fblike_vcount' displayText='Like'></span></li>
<li><span class='st_sharethis_vcount' displayText='Share'></span></li>
<li><span class='st_plusone_vcount' displayText='+1'></span></li>
<li><span class='st_twitter_vcount' displayText='Tweet'></span></li>
</ul>
</div>
</b:if>
Save your template and that’s it. You’re done!
How to Hide / Remove Status Message Bar in Blogger Blogs
What is “Status Message Bar” in Blogger Blog?
In Search pages or in Label Pages You can observe a Bar with some message at the top of posts.
that is Status Message Bar.
It should be like…:-
Showing newest posts for query XXXXXX. Show older posts
Showing newest posts with label XXXXXX. Show older posts
You can Remove or Hide this message by following simple tricks
1.By adding CSS code
2.By Removing Template code
1.HOW TO REMOVE THIS BAR BY CSS?
1:- Go to Blogger Dashboard > Template Tab > Edit HTML
2:- Find ]]></b:skin> tag
3:- Add the following code before it and save your template
.status-msg-wrap{display:none !important;}
2.HOW TO REMOVE THIS BAR BY CSS?
1:- Go to Blogger Dashboard > Template tab > Edit HTML
2:- Check Expand Widget Templates Check Box
3:-Then find Following code and remove it from template
<b:include data='top' name='status-message'/>
4:-Finally save your Template
That’s it. You can use any one trick from above
The Status Message Bar must Disappeared from your Blog.
Please Like this blog and share it with your friends....Thank you for visiting my blog......
How to Show HTML/JavaScript Codes within Blogger Posts or Comments

Have you faced any difficulties to show some particular codes or snippets within Blogger Post Editor or within the comment section? I hope, most of you did and still do. Well, I have the perfect solution to this.
While writing you will notice that every time you use "less than" sign (<) or "greater than" sign (>) to show JavaScript or HTML codes and snippets, either in Blogger Post Editor (in HTML mode) or within comments, it does not get published or better say, not visible.
This happens because Blogger recognizes it as codes that should be used for formatting purpose only. The only solution is to encode them.
So to show JavaScript or HTML codes within Blogger posts or comments, use < instead of < and > instead of >. Now if there are big codes then search for online tools to encode your codes.
This is the simplest method to show JavaScript and HTML codes within Blogger comments or posts
.jpg)

.jpg)